1. How many days do you need in Whistler?
2.What is the best summer month to visit Whistler?
There are a few answers to this: Before Crankworx if you want fresher bike park trails, during Crankworx if you want to be in the midst of it, or late July/ August if you are predominantly a trail rider instead of a park rat. (You will get good weather plus all the Blackcomb bike trails & Lord of the Squirrels usually open in late July).
3.How long is Whistler bike season?
Most trails are open by late May and weather is typically good all the way through September and sometimes October. Pemberton trails are typically the best in the Fall as they are perfect after rainfall.
4.Is Whistler good in September?
Usually yes! Typically the weather is dry and the town is a little quieter so it’s pretty perfect for the bike park and the trails! Plus you can still swim in the lakes too!
5.Are there bears in Whistler bike park and on the trails?
6.Is Whistler suitable for beginners?
7.What are the easy MTB trails in Whistler?
8.What is the most famous bike trail in Whistler?
There are a few good spots.
10. How to get to Pemberton or Squamish?
11. Best part of town to stay in?
Creekside is a great area as you can easily access trails plus the Creekside gondola is always quieter if you want to hit the park. FYI Creekside is not a beginner-friendly zone in the park so keep that in mind.
That said, Upper Village & Whistler are in the center of it all and are busier. Obviously, it’s super easy to access the Whistler gondola from these locations too.
12. Best type of bike to hire?
Enduro will allow you to do it all!! Park AND trails!! However, if you plan to ride park only and hit some big jumps and features, go for a down hill!
If you’re a beginner, go for a trail bike!
Please drop a comment below if you have a question that I haven’t answered & I’ll add it in!
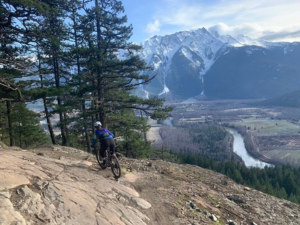
Everybody knows that Whistler is the holy grail of biking destinations, sandwiched between the impressive towns of Squamish & Pemberton, each with their own unique flavour of trails and terrain. When planning a shredcation to the area, it can definitely get a little overwhelming with hundreds of trails to choose from….
Cue a handy blog post written by a Whistler resident who has scoured the local trails to save you time and effort.
Nestled in the idyllic and rural town of Pemberton is the world-class slab playground, Cream Puff. A word of advice- get some slab practice in before you hit this trail. You can easily hit blue trails
en route to get you in the zone for this badboy. Click
for all the info you need on this trail.
As you can see, there is so much variety to be found in the area & I urge you to check out the other pages of this site to see which trails to link together for a rad day out on two wheels. The trails on this site have been included because they are worth your while – you deserve a great descent after putting the effort in on the gruelling climb!
You’ve been riding blue trails for a long time now and you’re starting to feel like you’ve plateaued…
You’re getting a bit bored of riding the same old trails and hearing about the rad black trails that all your friends are hitting…
And now you’re even considering buying a new bike to turn you into the gnarly shredder you always dreamed you’d be…
STOP RIGHT THERE! Instead of blowing your hard earned cash, take a look at these 5 simple practices that are guaranteed to improve your skills and make those black trails attainable.
1.Play around on the bike & experiment.
It’s meant to be fun, not awkward survival mode. Go back to the trails you feel comfortable on and ride them differently. Experiment with line choice, braking control, speed etc. Practice skills like hopping or manualing. Try to ride certain sections without pedalling.
Set a goal at the start of the trail and ride with that purpose. This will help to identify your strengths and weaknesses.
2. Ride with people that are slightly better than you.
Observe what they’re doing with bike handling and line choice. You can also watch YouTube videos of professionals and focus on what they’re doing in terms of body position on the bike. I.e
. Another good one to check out is
, who makes great tutorial videos to break it down.
Use the off-season as an opportunity to condition and strengthen your body for mountain biking. I.e the ability to resist bigger compressions comes with a stronger chest, shoulders, core and legs.
Hitting the pump track in your spare time will allow you to hone your skills in a consistent format. This is great for gaining immediate feedback. You’ll soon realise that natural trails are like a pumptrack through the woods and you’ll be thanking yourself for putting in the work, gaining momentum and flow in the right places.
5. Practice skills en route.
Every time you are heading to/from a ride, practice skills like manuals or the bunny hop on your way. Don’t just be on cruisy autopilot when you’re on a road, use it as an opportunity to goof off and practice at the same time. Prime time to practice is when you’re pumped after a trail.
Contrary to popular belief, buying a new bike with better specs is not the fasttrack to shredding. Riding your bike is the best way to improve, and riding with a purpose will accelerate that improvement. So shut down those bike review tabs and get out on your bike!
.png)
.png)